Before we begin, please make sure you have the following items:

Let’s get you familiar with the BluAX components you’ll interact with during setup.
What you’ll need to get started:
1.1
BluAX components you may interact with:
1.2
.png)

Your new BluAX device


[Fig. 1.1] Screen: Located in the center of the front panel.
The power cable and square adapter from the box
[Fig. 1.1] Boot Button: Positioned on the left edge of the device.
A nearby power outlet (wall socket or extension cord)
[Fig. 1.1] Reset Button: Position on the right edge of the device.
Your home Wi-Fi password
[Fig. 1.1] Signal Light (LED): Located at the top-right corner.
[Fig. 1.2] USB Type-C Port: Located on the back side, in the top-left corner.
A device with internet access (computer, tablet, or smartphone)
Part 1: Preparation


1.png)
Fig. 1.2
Fig. 1.1

Part 2: Powering your BluAX
Turn your BluAX to the back side (the side with the black fan).
The fan on the back will start spinning.
If everything works other than the screen (not displaying anything or displaying a glitch): Unplug the device from the wall outlet. Wait 30 seconds, then plug it back in, making sure all connections are snug.
If the blue light is on but nothing else: Find the button labeled “Reset” on the right edge of the device and press it once, do not hold for more than a second. If that doesn’t turn on the screen, repeat steps 1-4.
If you are not getting any power (no light or screen activity): Check your power outlet to make sure it’s functional. Try plugging the device into a different outlet.
In the top-left corner, find the USB-C port (small, oval-shaped).[Fig. 2.1]
On the front side, a small blue light will turn on in the top-right corner.[Fig. 2.2]
Plug one end of the power cable into this port.
The screen will light up and show the text: BLUAX SELF TEST. [Fig. 2.3]

Plug the other end of the cable into the power adapter, and then plug the adapter into your power outlet.
Follow the steps:
2.1
What you should expect to see:
2.2
Troubleshooting:
2.3
Fig. 2.1
2.png)

Fig. 2.3
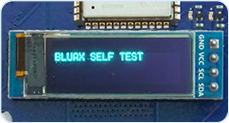

Fig. 2.2


Part 3: The Automatic Check-Up (Self-Test)
The screen will show the text: TEST PASS!. [Fig. 3.1]
The screen will show the text: TEST FAIL!. [Fig. 3.2]
The screen will show the text: VCORE: PWR FAULT [Fig. 3.2]
The screen will show the text: ASIC: FAIL X CHIPS [Fig. 3.3]
What to do:
What to do:
If the test passes:
3.1
If the test fails:
3.2

NOTE
Once turned on, your BluAX will now check itself to make sure everything is working correct-ly. This takes up to 20 seconds. No action is needed from you; the test will run automatically, and you can see the results on the screen.
Fig. 3.1
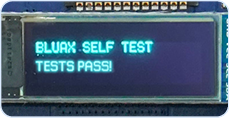
Fig. 3.2
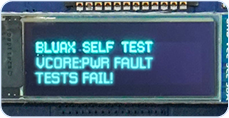
Fig. 3.3

This is great news! To continue, find the “Reset” button on the right edge of the front screen. Press it once, do not hold it for more than a second.
This usually means there’s a simple issue we can fix right now. Look at the screen for the message that appears (it’s a rolling screen).
This is the device’s way of saying, “Please double-check my power connection!”
The device couldn’t detect its chip during boot.
Make sure you are using the wall adapter that came in the box.
Unplug the power cable from the wall outlet.
Unplug the device from the wall and plug it back in to ensure it fits snuggly.
Wait for 10 seconds.
Double-check the outlet to ensure there is power running to it.
Plug it back in firmly. The test will run again.

Part 4: Connecting BluAX to your Home Wi-Fi
If done successfully, you will be on the Welcome Screen mentioned in the next step. You can now continue with the setup, connecting your BluAX to the Wi-Fi.
Bypassing the Auto Test
3.3
Follow the steps:
4.1

WARNING
If the device continues to fail the autotest, run a bypass so that our support team and better determine the issue. Follow these steps very carefully:
On the left edge of the front side of the BluAX, find the button labeled “BOOT”. [Fig. 3.4]
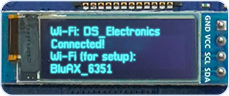
After the self-test, the BluAX screen should say: Welcome to your new BluAX! Connect ... [Fig. 4.1]
To start the WIFI connection process, we need to temporarily connect your phone or computer to the BluAX itself. On your smartphone or computer, go to your Wi-Fi Settings (where you normally connect to the internet).
Look for BluAX_xxxx in your Wi-Fi networks list. [Fig. 4.2, 4.3]Tap on it to connect. You should be connected automatically without a password.
Press and hold the “BOOT” button [Fig. 3.4] until you see the screen freeze, go blank, and then the BLUAX SELF TEST message will show
As soon as you see the BLUAX SELF TEST screen, let go of the Reboot button, press (don’t hold) and release the “RESET” button [Fig. 3.5] (the one on the right edge).
Fig. 4.2
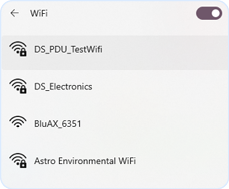
Fig. 4.3
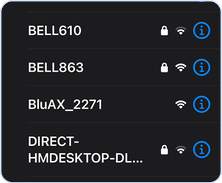
Fig. 4.1

Fig. 3.4
Fig. 3.5

A new web page should automatically open [Fig. 4.4]. If the page did not open, you can try to open the browser and manually type 192.168.4.1 into the address bar.
The page should show a title “Network Configuration” [Fig. 4.4]. On this page, you will be able to connect the BluAX to your home Wi-Fi.
Two messages will appear [Fig. 4.7], one for successfully saving the network setting and one warning you to restart. Click the “Restart” button [Fig. 4.6] on the page. Another message box will appear telling you the BluAX restarted successfully [Fig. 4.8].
Fig. 4.4
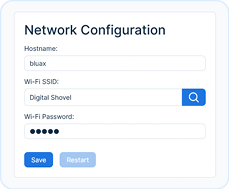


Fig. 4.6
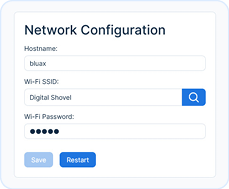

Fig. 4.7

Fig. 4.8
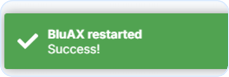
Fig. 4.5
Troubleshooting
4.2

NOTE
If you receive any error message other than No access point found during Wi-Fi connec-tion, the issue is most likely with your Wi-Fi. [Fig. 4.9] Please follow these steps:
Check your Wi-Fi password.
Check Wi-Fi signal strength / move closer to the router.
Unplug your BluAX, wait 30 seconds, then plug back in.
Check your Wi-Fi password.
If the issue continues after these steps, contact the support team.
Fig. 4.9
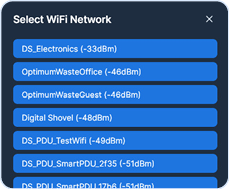
Click the “Search Icon” [Fig. 4.4]. A window will appear [Fig. 4.5] titled “Select WiFi Network”. Find and select your home Wi-Fi network. If it doesn’t appear, close the window, and type it in manually in the “Wi-Fi SSID” input field.
After selecting your home Wi-Fi network [Fig. 4.5], highlight the second box “Wi-Fi Password” [Fig. 4.4], carefully type in your Wi-Fi password, and then click the “Save” button [Fig. 4.4].
Part 5: Finishing Up and Viewing Your Dashboard
On your phone or computer, go back to your Wi-Fi Settings and reconnect to your normal home Wi-Fi network.
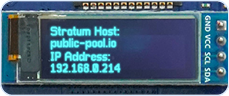
Look at the BluAX screen. It will now rotate between two displays. One of these screens will show an “IP Address”, which is a set of numbers that looks like this: 192.168.X.X [Fig. 5.1]
Open a web browser on your phone or computer (such as Chrome, Safari, or Edge).
In the address bar at the very top of the screen, type only the numbers of the IP Address exactly as you see them on the BluAX screen: 192.168.X.X
Press Enter.
Fig. 5.1
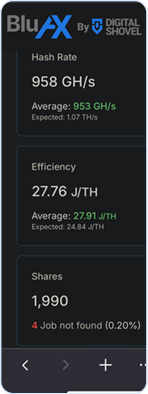
This will take you to the BluAX Dashboard, the control center for your device. [Fig. 5.2] [Fig. 5.3] If you don’t see the page, please double-check that your Wi-Fi connection is stable and that you entered the correct IP address.

SUCCESS
Congratulations! Your BluAX is now set up and ready to go.
Fig. 5.2
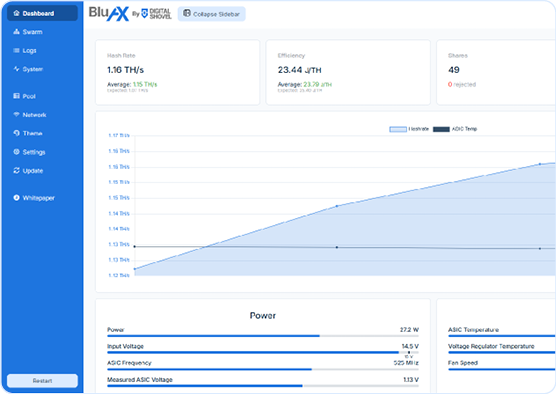
Fig. 5.3